- This is an article about the original Company of Heroes.
- Are you looking for the Royal Engineers article for Company of Heroes 2?
Sappers | |||
|---|---|---|---|
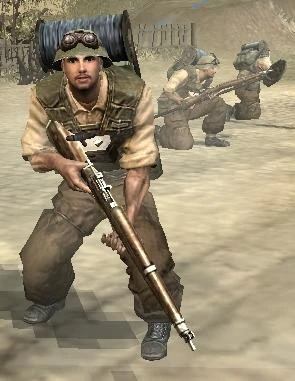 A British Sapper unit with demolition gear | |||
| Army | British | ||
| Role | Multi-purpose Support Infantry | ||
| Men per Squad | 4 | ||
| Unit Cost |
| ||
| Upkeep per Minute |
| ||
| Prereq. | None | ||
| Produced By | Field Support Truck | ||
| Cost to Reinforce |
| ||
| Health per Man |
| ||
| Infantry Type | Soldier | ||
| Basic Weapon | Lee-Enfield Mk III | ||
| Open Weapon Slots | 4 | ||
| Max. Speed |
3 m/s (friendly sectors) 2 m/s (other sectors) | ||
| |||
| |||
| |||


The Sappers are multi-purpose Support Infantry of the British Army corps, available in Company of Heroes: Opposing Fronts. They handle the heavier defensive construction for the army, all repair duties, and form most of the early British anti-tank force. Although they are not required for advancing the British tech tree, they are nigh indispensable for protecting British lines until British tactical superiority can be established.
Overview[]
The British, relying heavily on Defensive Structures to establish a strong line against the enemy, use their various infantry units to build all sorts of emplacements and traps for the enemy. This often starts with anti-infantry positions constructed by the British Infantry Sections. However, sooner or later the British will need to protect themselves from advancing enemy armor. This is where the Sappers come in.
The Sappers squad is a 4-man team, constructed at a Field Support Truck for the cost of ![]() 320.
Initially armed with Mk.III Lee-Enfield rifles, and only slightly less healthy than the tough Infantry Section, they are tasked primarily with the construction of anti-tank and anti-vehicle defenses, including 4 types of passive defenses like Barbed Wire and Mines, and 3 types of active defenses like the 17 Pounder AT Gun and Bofors 40mm Cannon. Additionally, Sappers are responsible for all repair duty of British emplacements, buildings and vehicles.
320.
Initially armed with Mk.III Lee-Enfield rifles, and only slightly less healthy than the tough Infantry Section, they are tasked primarily with the construction of anti-tank and anti-vehicle defenses, including 4 types of passive defenses like Barbed Wire and Mines, and 3 types of active defenses like the 17 Pounder AT Gun and Bofors 40mm Cannon. Additionally, Sappers are responsible for all repair duty of British emplacements, buildings and vehicles.
Sappers also form the British Infantry's main anti-tank arm, complementing the Infantry Sections' anti-infantry capabilities. To this end, Sappers can be equipped with PIAT launchers, which are basically heavy grenades launched in arc trajectories at enemy vehicles, causing good damage on impact. In this role, Sappers can ambush enemy armor and even assist advancing British units by flanking enemy positions and raining PIAT fire upon them.
Alternately, a Sapper squad can specialize in repair, allowing them to strengthen both vehicles and emplacements beyond their normal toughness. Or they can specialize in the detection of mines and destruction of buildings. Both these support roles can be as crucial to British success on the battlefield as anti-tank support.
Like the Infantry Section, the British Sappers have a speed penalty that applies whenever they leave friendly territory, causing them to move slowly and cautiously and exposing them to enemy fire. This can be undone with their demolition upgrade, but is similarly negated by the presence of a nearby Lieutenant. Sappers receive officer additional Command Bonuses like all other infantry.
Weapons[]
The Sappers squad is created with 4 Lee-Enfield No. 4 Mk. I rifles, identical to the ones used by the Infantry Section. This makes them relatively good combat units at long range, but lacking short-range offensive capabilities.
Sappers can then be upgraded with a PIAT launcher, a hand-held spigot mortar that can do significant damage to enemy vehicles and even tanks. Lacking strong Penetration, the PIAT's explosive warhead is nevertheless quite potent. It can even do harm to enemy buildings fairly rapidly.
Note that Sappers can pick up fallen weapons left behind by other (dead) infantry units, both enemy and friendly. They can crew abandoned Team Weapons as well.
Lee-Enfield Rifle No. 4 Mk. I[]
The basic Sapper rifle is a trusty bolt-operated, magazine-fed rifle. It fires single shots which are fairly accurate over long distances. It is one of the best infantry rifles (barring Sniper rifles, of course), coming close to the Axis Stormtrooper Squad's improved Kar98 in effectiveness.
Nonetheless, in a close-quarters battle, this rifle is considerably less useful, especially when compared to automatic weapons.
PIAT launcher[]
The Projector Infantry Anti-Tank, or PIAT is a hand-held spigot mortar, using a powerful hand-operated spring to launch a heavy warhead at enemy units. 2 PIAT launchers are added to the team when the PIAT upgrade is installed on a unit of Sappers.
The explosion of the PIAT warhead does about as much damage as a medium tank-gun shell, though its radius is quite small (not enough to kill infantry) and its Penetration lacking. A couple of these grenades are usually enough to take out a vehicle, and direct hits to enemy buildings will cause significant damage.
Unfortunately, the PIAT is very inaccurate (though slightly improved in later patch versions), and there are long pauses between every shot. For this reason, PIAT-armed Sappers often require plenty of support from other units to prevent them being destroyed before they can do enough damage. Also unlike other anti-tank weapons, since the PIAT is a "spigot mortar", it can be used from behind large obstacles like hedgerows without exposing itself to (at least fire from) any enemy units on the other side of said obstacle (of course unless there are artillery units like mortars behind the obstacle...)
Together with the PIAT upgrade, the unit also gets the ability to perform a PIAT Ambush. This puts the unit into camouflage mode, allowing it to fire up to three PIAT rounds at incoming enemy vehicles before being detected. It requires the squad to remain motionless in at least ![]() Light Cover.
Light Cover.
The PIAT has an especially difficult time hitting infantry inside of civilian structures, such as houses, as the special trait that allows it to fire through most obstacles also includes map buildings.
Note: When an infantryman holding a PIAT is killed, and there is no other squad-member available to pick the weapon up, there is a 20% chance of the weapon being dropped and becoming abandoned. Other infantry squads (friendly or enemy) can pick this weapon up if they have at least 2 Open Weapon Slots.
Production[]
Sappers can build no less than 7 different kinds of Defensive Structures. 4 of these are Passive Defenses, meant to provide cover for other units or impede the advance of enemies into a sector. The other 3 are Active Defenses, armed with very heavy weaponry that can break apart most enemy advances.
 Slit Trench[]
- Costs nothing.
- Takes 20 seconds to build
The Slit Trench is a defensive emplacement that can be garrisoned by any infantry unit. It does not have any offensive capability on its own.
Units inside the Slit Trench are considered to be in ![]() Heavy Cover, and are almost impervious to any direct-fire weapons, including small-arms and even tank cannons. They are also impossible to suppress. Nonetheless, they are vulnerable to high explosives and artillery fire.
Heavy Cover, and are almost impervious to any direct-fire weapons, including small-arms and even tank cannons. They are also impossible to suppress. Nonetheless, they are vulnerable to high explosives and artillery fire.
Infantry in a Slit Trench can fire in any direction. However, they receive less protection when an enemy attacks the trench from the side, meaning that orientation when placing the Slit Trench is very important.
When ungarrisoned, the Slit Trench can be occupied by enemy troops just as easily, so make sure to place it in a position where, if captured, it cannot be used effectively against you. Or just make sure that enemy infantry cannot get anywhere near it.
Barbed Wire[]
- Costs nothing
- Takes 2.5 seconds to build per piece
Barbed Wire is an anti-infantry obstacle. Infantry cannot pass through a piece of Barbed Wire, and has to go around it.
Place Barbed Wire along infantry approach routes to funnel infantry into a killing zone, I.E. an area covered by machine guns, Slit Trenches and/or mortars. This ensures that the enemy cannot flank your positions, and has to come straight into your line of fire.
Barbed Wire can be run over by almost all vehicles without a moment's thought, so avoid placing it in areas where vehicles (both yours and the enemies) are likely to pass. Also, remember that enemy Pioneer Squads can dismantle Barbed Wire.
Sand Bags[]
- Costs nothing
- Takes 7 seconds to build per piece
Sand Bags are man-made cover for infantry. Infantry units behind sand-bags are granted ![]() Heavy Cover, making them much less vulnerable to direct damage and Suppression. However, they are just as vulnerable to explosives and artillery fire as troops in the open.
Heavy Cover, making them much less vulnerable to direct damage and Suppression. However, they are just as vulnerable to explosives and artillery fire as troops in the open.
Like Barbed Wire, Sand-Bags also act as infantry obstacles. They are less useful though, since they give passing-by enemy infantry units a good place to take cover as they move, and so should not be used in this capacity unless you actually want the enemy to take cover there (to bombard them with a nearby mortar emplacement, for instance).
Sand-Bags can be run over by almost all vehicles without a moment's thought, so avoid placing it in areas where vehicles (both yours and the enemies) are likely to pass. Sand-Bags are also quite easily destroyed whenever anything explodes near them.
Mines[]
- Costs 25 per piece
- Takes 10 seconds to build per piece
Mines are powerful bombs that are buried underneath the ground. Whenever an enemy unit moves over a Mine, it will detonate with incredible force, usually destroying or at least heavily damaging the enemy.
This specific type of mine is indiscriminate, detonating regardless of the type of enemy unit that passes over it. Therefore, both enemy infantry and vehicles will trigger the Mine. Your own units and vehicles can move freely over any mine set by friendly forces without detonating it.
Mines explode at a radius of 8 meters, and inflict 100 points of damage. The damage is distributed nearly evenly across the entire explosion area, meaning that it will usually kill most or all of a triggering enemy infantry squad. Against vehicles, mines usually cause extra damage, and even if they fail to destroy the vehicle they will usually damage or destroy its engine, slowing it down considerably.
Mines should be set as a preliminary defensive measure against incoming enemy attacks, while permanent emplacements are being set up. Even then, a minefield can seriously hurt attacking enemy units before they reach the emplacements' line of fire, making the job of destroying them that much easier. However, once a mine blows up, it needs to be replaced for ![]() 25 to keep that point inaccessible to the enemy.
25 to keep that point inaccessible to the enemy.
The best place to put mines is on an approach that you are not intending to defend with emplacements at all, like flanks and secondary narrow passages that are not worth wasting Population Cap points. If the enemy does decide to try to sneak some troops through these approaches, he'll soon regret it.
Note that Mines can explode if struck with enough force (for example artillery shelling), so it is possible to clear away enemy mines by bombarding them. Also, engineer-type units can dismantle mines, and there are several types of units that can detect them without walking over them.
17 Pounder AT Gun[]
- Costs 280, 25, 3
- Takes 30 seconds to build
The 17 Pounder AT Gun is one of the most fearsome British Defensive Structures available. It is essentially a massive anti-tank cannon set-up in a sand-bagged trench.
This weapon's massive attack damage (150) and powerful Penetration values can effectively destroy most enemy vehicles driving into its line-of-fire with only a few shots - even to front armor. The emplacement itself is quite resistant to damage, being vulnerable mainly to anti-building weapons like flame-throwers or artillery, but not so vulnerable to the tanks it is meant to destroy. One feature that gives you an edge in tank battles is that the 17 Pounder can be loaded with armor-piercing rounds that can do internal damage to tanks.
With a firing cone of 50 degrees (and the ability to rotate on command), and a range significantly longer than its line of sight, the 17 Pounder can defend an approach against virtually any vehicle. Though it is less accurate against lighter, faster vehicles, it can nonetheless kill these if it manages a hit, and slower vehicles are likely to get destroyed when facing it. Even the King Tiger will take damage from the 17 Pounder's attack, especially to its side or rear armor.
17 Pounders are surprisingly accurate against infantry (though this was rectified in a later patch), capable of taking out one man with almost every shot. Nonetheless, infantry pose a significant threat to the gun if they manage to get close (or flank it), which means that 17 Pounders should be protected by other emplacements or infantry at all times. Also make sure to keep enemy artillery from bombarding the gun, otherwise it can be quickly destroyed.
Bofors 40mm Cannon[]
- Costs 280, 15, 3
- Takes 45 seconds to build
The Bofors 40mm Cannon is nominally an anti-aircraft weapon, firing 40mm shells at enemy bombers. However, like all other anti-aircraft weapons in the game, it can be pointed horizontally to engage enemy ground units too.
The Bofors fires short, slow bursts of 40mm slugs, and is very accurate about it. Each slug can seriously hurt an infantryman, but more so it will do a lot of damage to light vehicles like the Sdkfz 234 Armored Car. A single Bofors cannon can easily hold a position against light infantry and vehicle attacks.
Furthermore, the Bofors shells are powerful enough to penetrate the rear armor of most medium tanks. Nonetheless this gun should not be trusted to hold off tanks, especially since it lacks the penetration to get through their front armor.
25 Pounder Gun Howitzer[]
- Costs 450, 75, 10
- Takes 60 seconds to build
The British field artillery piece is the 25 Pounder Gun Howitzer. This is a stationary gun that can fire a heavy artillery bombardment on command. Though expensive, it often is crucial to both British defense and attack strategies.
25 Pounder artillery bombardments are relatively frequent (less so in the later patches), and can damage all sorts of units. They are also completely free once the gun is built.
A British player with the Royal Artillery Support Doctrine can make excellent use of this battery, increasing its range and enabling it to perform all sorts of artillery-related abilities.
Finally, the 25 Pounder Gun Howitzer is one of the few units that reacts to the Captain's Victor Target ability. Only this emplacement, the Priest Self-Propelled Artillery, and mortars (through mortars only act if the ability is activated inside their range of fire) react to Victor Target.
Detector For Radio Triangulation[]
- Requires Royal Commandos Support: Radio Triangulation Detectors
- Costs nothing.
- Takes 4 seconds to build.
This structure is unique, as it has no defensive or offensive capabilities, but is instead used only to detect enemy movement. Each detector on its own is meaningless - until 3 of them have been constructed.
Once 3 detectors are placed anywhere on the map, they form a triangular area with each detector constituting one corner. Any enemy unit inside the triangle at any time will be shown on your Mini-Map and Tactical Map. Units leaving the triangle will disappear into the Fog of War as normal.
Once constructed, the Detector becomes camouflaged and can only be detected by enemy units passing very close to it. This allows Detectors to be placed behind enemy lines, even close to enemy positions, without risking their destruction.
By creating a large enough triangle, it may be possible to remain privy to the location of most, if not all enemy units. This allows Commando units to navigate safely between enemy patrols, not to mention react to enemy movement with surgical precision. As an added bonus, your main-line defenses can more properly react to incoming enemy attacks, and your artillery can be used to barrage enemy units discovered this way.
Since Sappers will rarely find themselves deep behind enemy lines, they will usually be required to build these detectors in your own territory, forming the base or tip of the triangle with the other detectors placed deep in enemy territory by glider-inserted Commandos.
Abilities[]
Being a multi-purpose support squad, Sappers have a large array of abilities at their disposal. Their primary ability allows them to repair friendly vehicles and buildings.
Once a specialty upgrade is purchased for this squad, it acquires one additional ability specific to that upgrade. The basic Sappers squad does not have any of these abilities available. Since only one upgrade may be purchased for each Sappers squad, only one of these extra abilities will be unlocked, even if the squad later picks up additional weapons from another fallen squad.
Withdraw to Captain's Position[]
- Costs nothing.
- Activation: Immediate.
- Cooldown: 60 seconds.
Like all other British infantry, once a Captain is recruited, the Sappers can retreat to his current position at any time.
As with the normal "Retreat" ability common to all Infantry, once this ability is activated the Sappers will leave the player's control and set a direct course for the Captain. The retreat will break any Suppression effects the Sappers may be suffering from at the time.
Retreating to the Captain's position can save the unit from death in battle. The advantage in retreating to the Captain's position is that the Captain is usually closer to the front lines than the Headquarters Command Truck. Once the Sappers reaches the Captain, they'll be on safer ground thanks to his command bonus as well.
It's also possible to use this ability defensively, by first moving the Captain to a sector in need of a quick defense, and then "retreating" several infantry units to him. The extra speed means the infantry will arrive at the sector much faster, and then will benefit from the Captain's defensive bonuses as they engage the attacking enemy units.
Repair[]
- Costs nothing.
- Activation: Select Target (Friendly damaged vehicle/building)
- Ends when interrupted or target is at 100% health
- No Cooldown
The Repair ability is commonly activated by placing the cursor over the target and clicking the right-mouse-button. This will automatically move the Sappers to their target to begin repair. You can also use the menu button shown above to activate this ability, in which case you then need to select your target.
Once the Sappers reach their target, they will begin repairing it, at a rate of 5 health points per second. This will continue until the target reaches 100% health.
Repairs can be done on any friendly vehicle or building, as long as they have at least a little damage to be repaired. Use this to restore the target to working order, so that it can go back to fighting the enemy. This is crucial, as it can save a vehicle or building from being destroyed and having to be re-built.
While repairs are proceeding, you receive a penalty of -2% off your Manpower accumulation. This is normally insignificant: it will usually waste only about 5 Manpower points per minute, which is not too bad. Also, during repairs the Sappers are twice as vulnerable to damage as normal.
The Repairs will continue until the target reaches 100%, or the player issues another order to the Sappers. Sappers repairing vehicles will try to keep up with those vehicles (at least, most of the time) without breaking the order. If the target is destroyed while being repaired, the repairs will naturally stop.
Over Repair[]
- Requires the Expert Engineers upgrade
- Replaces the Repair ability
- Costs nothing.
- Activation: Select Target (Friendly vehicle/building)
- Ends when interrupted or target is at 100%+300 Health
- No Cooldown
The Over Repair ability becomes available once the Sappers receive an Expert Engineers upgrade. It replaces the Repair ability (outlined above), and is identical to it except for three important differences:
- This ability repairs 10 damage points per second, instead of the usual 5.
- This ability does not terminate when the target reaches 100% health. Instead, it will continue until an extra 300 health points have been added to the vehicle, and only then terminate.
- This ability can be used on any friendly vehicle/building, regardless of whether or not it is damaged.
The result is faster repairs which can also increase the target's health well beyond 100%. The health bars of vehicles and buildings with more than 100% will be white instead of its default color.
Note that this extra health immediately begins to decay once repairs have stopped. The target's health will slowly decline to 100%, and then stop declining. At that point, the health bar will return to its default color ( which depends on your team).
In later patches, the health bonus is a percentage, rather than a straight addition of 300 points. Therefore, a vehicle with low maximum health will not get as many extra points as one with a high maximum health.
It is often a good idea to use this ability during lulls in the fighting to strengthen important vehicles and buildings.
PIAT Ambush[]
- Requires the PIAT upgrade.
- The Sappers must be stationary and in Heavy Cover
- Costs nothing
- Activation: Immediate
- No Cooldown
Once a Sappers squad has taken the PIAT upgrade, it gains access PIAT Ambush. Place a Sappers squad in ![]() Heavy Cover and make sure they are motionless. The button will light up, allowing you to activate PIAT Ambush mode.
Heavy Cover and make sure they are motionless. The button will light up, allowing you to activate PIAT Ambush mode.
Sappers entering PIAT Ambush mode become camouflaged. Only units passing close to the Sappers, or possessing strong detection abilities, will be able to spot the Sappers. Any order given to the sappers will break the Ambush immediately.
The Sappers will automatically open fire at any armored vehicle that passes within range. They can take up to 3 shots at the vehicle with their PIAT weapons before the camouflage wears off and the unit returns to normal visibility.
If you wish to avoid giving away an Ambush point prematurely, you can turn off the unit's automatic fire by clicking the button that appears in its menu. It will not fire at enemies so long as it remains undetected. You can then press the button again when you wish the Sappers to engage their target, at which point they'll have up to 3 shots before being detected (as above).
For best use of this ability, put Sappers along roads where enemy vehicles keep coming through, and hold their fire until a good target comes by. You can also use this ability intermittently, to have your Sappers "hop" between ![]() Heavy Cover spots, camouflage to avoid detection, and move again when the coast is clear. You can get them far into enemy territory on a map with lots of cover, preferably towards enemy emplacements and/or artillery sites.
Heavy Cover spots, camouflage to avoid detection, and move again when the coast is clear. You can get them far into enemy territory on a map with lots of cover, preferably towards enemy emplacements and/or artillery sites.
Demolition Charges[]
- Requires the Disposal and Detection Section upgrade.
- Costs 50
- Activation: Select Target (non-friendly building)
- Takes 7 seconds to complete
- Cooldown: 60 seconds
When the Demolition Charges ability is activated, select a target building that is not owned or occupied by your troops. The Sappers will move to that building, and install a large demolition charge at its base. This process takes 7 seconds, and at the end an icon of a bomb with the words "Detonate!" will appear over the target building. Your Sappers will then immediately retreat to a safe distance of about 10 meters.
When the button is pressed, the demolition charge will detonate in a large explosion, dealing 300 points of damage to anything in a 7-meter radius around the bomb. This may or may not destroy the building itself, but will surely kill any infantry garrisoned inside or standing nearby. The explosion will also damage vehicles, and although it lacks Penetration, will still do considerable damage.
Use this ability to destroy enemy strong-points or emplacements. Of course you'll want your Sappers to be able to reach the target and sit there for 7 seconds without being killed, which usually means drawing fire with other infantry or approaching from a flanking position. The Lieutenant's Heroic Charge ability can help get your troops past enemy enfilading fire if necessary.
Always remember to get your Sappers and other units out of the way as quickly as possible before detonating the bomb - otherwise it may kill them too.
Upgrades[]
A new Sappers squad has no less than 3 different upgrades to choose from, which will augment its weapons loadout in order to specialize in one specific support role. Only one of these upgrades can be installed, after which the unit will retain the upgrade until it is destroyed. There is no way to change the unit's specialization afterwards.
Each of these upgrades will enable a single extra Ability. This ability will remain available as long as at least one squad-member survives.
PIAT[]

- Costs 75
- Requires at least 2 Open Weapon Slots
- Takes up 2 or 4 Weapon Slots (as available)
- Takes 30 seconds to install
This upgrade outfits the Sappers with 2 PIAT launchers, replacing two of the Mk.III Lee-Enfield rifles they were initially carrying. As a result, the unit can use the PIAT Ambush ability.
This upgrade turns the Sappers into an anti-tank unit. The PIATs can do serious damage to light vehicles, armored vehicles and light tanks, though they fire slowly and inaccurately. A PIAT can even do damage to the rear and/or sides of enemy medium tanks.
Note that the range of the unit's weapons is decreased to 80% of their original value when this upgrade is taken. This presumably is used to make sure the unit closes the distance with enemies to fire its PIATs, in order to somewhat offset the inherent inaccuracy of this weapon.
If the unit is killed in action, a PIAT launcher may drop to the ground. It can then be picked up by both friendly and enemy infantry.
Note: If the squad has 2 or 3 Open Weapon Slots when this upgrade is purchased, only one PIAT is added.
Disposal and Detection Section[]
- Costs 50
- Requires at least 2 Open Weapon Slots
- Takes up 4 Weapon Slots
- Takes 20 seconds to install
This upgrade outfits the Sappers with demolition gear. One of the Sappers receives a Mine-Sweeper tool, which replaces his Mk.III Lee-Enfield rifle. As a result, the unit can use the Demolition Charges ability.
This upgrade turns the Sappers into an anti-building unit, thanks to its ability to destroy buildings with its Demolition Charges.
Also, the unit is now capable of detecting mines within a range of 15-meters of its position at all times, even while moving. Additionally, the unit's British Infantry movement speed penalty, applied to infantry units in non-friendly territory, is negated by this upgrade.
Note: This upgrade takes up 4 Weapon Slots, meaning that after purchase the unit cannot pick up any additional weapons. However, if the unit has already picked up some weapons and has only 2 or 3 Open Weapon slots when this upgrade is purchased, it will keep the extra weapon(s) and will not receive a mine-sweeper - but will still receive the mine detection bonus associated with it! Therefore, if possible, try to acquire a weapon or two before purchasing this upgrade, to increase the team's firepower without any adverse effects.
Expert Engineers[]
- Costs 75
- Requires at least 2 Open Weapon Slots
- Takes up 2 Weapon Slots
- Takes 25 seconds to install
When this upgrade is completed, the unit will have acquired the Over Repair ability to replace the basic Sappers Repair ability.
With Over Repair, target units are repaired twice as fast, and can be repaired to well over their 100% maximum health (exactly 300 health points higher, to be exact). This allows strengthening vehicles and emplacements to withstand more damage from enemy fire.
Although the Sappers receive a visual makeover when taking this upgrade, their combat equipment is not changed - they receive no new weapons or modifiers to their combat properties.
Tactics[]
The British army relies on a powerful defense, protecting its lines with heavy emplacements that can handle any enemy assault. The Sappers are a key unit in the construction and maintenance of these emplacements. In addition to this crucial task, they can assume any one of three different available support roles, increasing their usefulness.
Sappers can only be constructed at a Field Support Truck, meaning that one has to be called in before Sapper production can begin. Their cost, ![]() 320, makes them one of the cheaper infantry units in the British army, though still more expensive than most infantry available to other factions.
320, makes them one of the cheaper infantry units in the British army, though still more expensive than most infantry available to other factions.
The 4-man Sappers team can be used offensively and defensively, and will perform very differently in each of these capacities. To make matters more complicated, installing any upgrade on a team of Sappers can radically change the way it should be used in combat. The sections below will detail how each of these specializations affects the use of Sappers during the battle.
On the Defensive[]
The primary task of the Sappers when you first acquire them would be to set up defenses in secured sectors. While your Infantry Sections set up Vickers Machine Gun Emplacements and 3" Mortar Emplacements, Sappers can get to work installing heavier equipment such as the Bofors 40mm Cannon and 17 Pounder AT Gun, to protect these sectors from vehicular attacks. You can usually hold off on the AT guns until you determine that the enemy may be close to (or already is) producing tanks.
If you have plenty of Munitions, it's sometimes best to start by building Mines at the approaches to the sector, so that while further construction is taking place the enemy cannot counter-attack without taking heavy losses. Alternately, if supported by other Infantry, the Sappers can choose to start with construction of a Slit Trench or even Sand Bags to give those units a place to take cover while the Sappers continue their work.
Final construction will usually include a 25 Pounder Gun Howitzer (or even more than one). Put these behind your emplacements, but not too far behind so that its range will sufficiently cover any enemies detected forward of your lines.
During their off-time from construction, Sappers are expected to repair damaged emplacements and vehicles returning from combat. This means that they will usually wait behind the lines, and do not take an active part in the defense if not absolutely required. They are too important, and usually are not terrific fighters to begin with. If you want a single Sappers unit to handle repairs in several sectors, you can use a Bren Carrier to transport it from one to the other rapidly.
PIAT Squad on the Defensive[]
- The PIAT Squad can take a more active role in defending your sectors. Placed in a Slit Trench for example, it can fire PIATs at enemy vehicles approaching a sector point. Couple them with Infantry Sections to protect a sector against multiple types of threats.
- Since the PIAT is best used from behind (at least against tanks), try putting the PIAT team in a position where it can flank attacking enemies quickly. Again, you can use Bren Carriers to get the PIAT team behind the enemy if you can afford it.
- You can also use the PIAT Ambush ability to keep your Sappers slightly forward of the line, in camouflage, until an enemy vehicle comes to attack. This way it will already be behind the vehicle when it's time to strike.
- Overall however, try to replace the PIAT team with an anti-vehicle emplacement. These work far better on the defense to begin with.
Demolition Squad on the Defensive[]
- The Demolition Squad is not really a defensive unit: its primary tasks are mine detection in enemy territory, and the destruction of enemy-occupied structures.
- Nonetheless, if your defensive line is sitting across from one or more buildings that can be used against you, a good tactic is to rush your Demolition Squad out during a lull in the fighting, and plant demolition charges on those buildings. In case of emergency, blow the buildings up! Remember however that enemy engineering units can disarm these charges.
Expert Engineers Squad on the Defensive[]
- Expert Engineers should not be put on the Defensive line. Their job is strictly to repair and strengthen your emplacements and vehicles with the Over Repair ability.
- These troops will most definitely want a Bren Carrier to ferry them around the map. This way they can reach any damaged target quickly to put their skills to good use.
On the Offensive[]
If basic Sappers are sent into battle at all, it is either to provide a little extra firepower to a group of infantry, or to construct emplacements to defend any newly-captured territory. If you're doing the former, use them like a basic Infantry Section, primarily to flank enemies. If the Sappers are there to fortify after the capture, keep them behind the rest of the force, and try to keep them out of the fight until the sector is captured. Protect your sappers, especially when they are constructing.
PIAT Squad on the Offensive[]
- This is where the PIAT Squad really gets to shine. By flanking enemy vehicles and emplacements, the PIAT Squad can cause a lot of damage. You can use a Bren Carrier to get it past or around the enemy, then start showing those PIAT warheads on them. Always make sure you have a way to escape if you can - even if it means running into Heavy Cover and using the PIAT Ambush ability to disappear.
- The PIAT Ambush has another application which can open up a great tactic for you: "Ambush Hopping". In this tactic, the PIAT team quickly runs from one Heavy Cover to another, using their PIAT Ambush ability to stay out of sight. If the map has enough Heavy Cover available, it is possible to get the PIAT squad pretty far behind enemy lines this way. Keep your patience, try not to get detected while running about, and only move when you think the coast is clear. If you manage to reach an undefended emplacement, destroy it with the PIATs and disappear or retreat. Always keep your enemy guessing about the location of the squad. Very skilled players can even reach the enemy base, and begin destroying the enemy's buildings while the base is left undefended.
Demolition Squad on the Offensive[]
- The Demo Squad works differently from other Sappers, in that it often moves ahead of your lines or your advancing columns. This allows it to detect enemy mines before your forces run over them. You can do this even when not planning an attack, just scan possible attack avenues for mines in preparation.
- The Demo Squad can also be used during the actual attack, by demolishing enemy emplacements or garrisoned buildings. To do this, the Demo Squad has to get very close, so it's always better to flank the enemy first. Skilled players can get the Demo Squad behind the enemy during the attack, and place bombs in buildings that the enemy will likely try to garrison. As the enemy infantry rushes to cover, blow the bomb and take them out.
Weaknesses[]
As with other infantry, the Sappers are weak to all manner of small-arms and high-explosive munitions. Putting them in Slit Trenches can help greatly to keep them alive, even under artillery barrages.
Sapper weapons are poor at killing infantry almost at any range. While they have a little more health than most infantry units, the Sappers will not last long in a straight firefight, especially if the enemy manages to get close.
Finally, whenever they are building or repairing, Sappers are significantly more vulnerable to all sources of damage. If you spot an enemy Sappers squad performing construction or repair, attack it!
Quotes[]
Gallery[]
")
")
")
")
")
| British Arsenal | |||||||||||
|---|---|---|---|---|---|---|---|---|---|---|---|
| Command Trucks | |||||||||||
| Infantry Squads | Infantry Section · Sappers | ||||||||||
| Light Vehicles | |||||||||||
| Medium Vehicles | |||||||||||
| Heavy Vehicles | |||||||||||
| Command Units | |||||||||||
| Defensive Structures | |||||||||||
| Other Structures | |||||||||||
| Royal Support | |||||||||||
| Royal Support-specific Units |
| ||||||||||
| Royal Support-specific Structures |
| ||||||||||