25 Pounder Gun Howitzer | |||
|---|---|---|---|
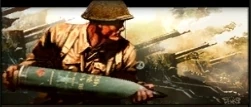
 A 25 Pounder Gun Howitzer opening fire | |||
| Army | British | ||
| Role | Heavy field artillery emplacement | ||
| Unit Cost |
| ||
| Upkeep per Minute |
| ||
| Prereq. | None | ||
| Produced By | Sappers | ||
| Production XP | +44 xp | ||
| Primary armament | OQF 25 Pounder | ||
| Health |
| ||
| Armor | None | ||
| |||


The 25 Pounder Gun Howitzer, or 25 Pounder for short, is a heavy artillery emplacement built by the British in Company of Heroes: Opposing Fronts. It can shell targets at a considerable distance, and most importantly: for free. With the Royal Artillery Support tree, the 25 Pounder Gun Howitzer is one of the most powerful weapons in the British arsenal.
Overview[]
With the British army operating on the basis of strong defensive positions, it is only naturally that it will field heavy artillery support from behind those defenses. The 25 Pounder Gun Howitzer is often the primary piece of this strategy, both providing a deterrent against enemy attacks, and flattening enemy defensive positions at leisure.
Construction of a 25 Pounder Gun Howitzer is available relatively early: it is built by Sappers, who become available shortly after the initial stages of a battle. However, its cost is quite prohibitive: ![]() 450,
450, ![]() 75. It also consumes
75. It also consumes ![]() 10, making it unlikely to build more than a scant few. It is usually built once the British have established at least one heavily-defended position which can keep the gun safe.
10, making it unlikely to build more than a scant few. It is usually built once the British have established at least one heavily-defended position which can keep the gun safe.
When construction is ordered, The Sappers will create an entrenched position, defended by sand-bags from all sides. The 25 Pounder is then placed inside, and is rendered immobile. If the situation calls for the artillery to be moved elsewhere on the map (for example, closer to the front lines), you can always scuttle the emplacement and built a new one where it is needed.
The 25 Pounder's primary attack is a 6-shell barrage that can be fired at any point within a certain radius of the gun. Each shell explodes with massive force, damaging virtually everything within a 7-meter radius of the impact. It will kill infantry, destroy light vehicles and armored cars, and even cause significant damage to tanks and buildings. Unfortunately, accuracy drops the further away the gun fires, but it is nonetheless dangerous even at its maximum range.
A British commander who specializes in Royal Artillery Support will normally count the 25 Pounder Gun Howitzer as one of his primary weapons (with Priest 105mms being the other one). This is thanks to a copious number of upgrades that both improve the 25 Pounder Gun Howitzer's performance significantly and open up unique new abilities for it to use.
The 25 Pounder Gun Howitzer is also one of the most valuable targets for the enemy, so expect it to come under fire a lot. The Howitzer emplacement has no defensive weapons, and cannot even fire at enemies less than 35 meters away. Given its value to you, try to keep it safe at all times, behind a strong line of defensive units.
Weapons[]
The 25 Pounder Gun Howitzer is the name of the cannon inside the emplacement, which is officially referred to as the OQF 25 Pounder. Originally a mobile cannon, game mechanics (and balancing reasons) do not allow it to be moved. Nonetheless, this fearsome 25-pound shells will do significant damage to anything within its range.
The 25 Pounder emplacement has no secondary weapons, and cannot defend itself against any enemy within normal sight-range (25 meters).
OQF 25 Pounder[]
The OQF 25 Pounder is a short-barreled artillery piece (a Howitzer) capable of lobbing 25-pound shells that are set to explode on impact. Each of these shells explodes with tremendous force, sending shrapnels and rocks flying through the air at great speed, killing infantry and destroying light vehicles.
The shells explode with a high damage output - comparable to the stronger anti-tank weapons. However, the shell is loaded with a high-explosive charge, rather than a penetrating charge, which means it will blow away a large area but may do little damage to armored targets.
The diameter of a single blast is 7 meters. Within 1 meter, enemy units receive a whopping 187.5 damage, which is enough to kill any infantryman and do massive damage to vehicles. At around 4 meters away from the blast, targets still receive 93.75 points of damage, and at 7 meters they take 37.5 points of damage. Needless to say, obstacles within the explosive radius are likely to be obliterated as well.
25 Pounder shell explosions will damage vehicles, especially if they are close to the blast. If by chance a shell hits a vehicle's rear armor, it has some chance to penetrate it, either destroying or heavily damaging the engine or blowing the vehicle up entirely.
Buildings suffer reduced damage from shelling. Nonetheless, they will eventually succumb to continuous bombardment. Infantry inside buildings are not as well protected, and can be knocked out by a single blast landing close to the building.
The range of these shells is (by default) 145 meters, about half a map's length. However, note that the weapon's minimum range is 35 meters, so the weapon cannot engage nearby targets in defense of itself. That's why leaving a 25 Pounder Howitzer to fend for itself will normally lead to it being destroyed.
Abilities[]
By default, the 25 Pounder Gun Howitzer has only a single ability, 25 Pounder Barrage, which serves as the weapon's only method of attack.
With Royal Artillery Support selected by the British player, the weapon will quickly receive up to 4 different kinds of abilities that allow it to fire further and perform various types of coordinated artillery shelling.
 25 Pounder Barrage[]
- Costs nothing
- Activation: Select Ground (within 35–140 meters of the gun)
- Cooldown: 105 seconds
The 25 Pounder Barrage is the Howitzer's only primary attack - a manually-activated shelling of a selected target area.
When activating this ability, select a point on the ground between 25 and 145 meters away from the gun. The 25 Pounder will automatically rotate towards the target, and then fire exactly 6 shells at the targets area.
The further away the target, the less accurate the shells. Firing at a target 40 meters away will generally land all shells right on top of it, while firing at a target 145 meters away will scatter the shells within a large radius around the center.
Note that the target does not need to be visible - it is valid as long as it's within the ranges listed above.
25 Pounder Super Charge[]
- Costs nothing
- Activation: Select Ground (within 25–225 meters from the gun)
- Requires the Royal Artillery Support: Super Charge Artillery ability
- Replaces the 25 Pounder Barrage ability
- Cooldown: 90 seconds.
This ability is identical to the 25 Pounder Barrage ability (see above), serving as the cannon's only primary attack. It replaces the 25 Pounder Barrage ability entirely, once acquired.
The only difference is in the range of your shells. You can use this ability to target any area within 25 to 225 meters of the gun. This allows the Howitzer to fire at targets clear across the map - sometimes all the way over to the enemy base.
Again, accuracy drops with range, so it may still be better to place this gun closer to your front lines (as long as you can keep it safe) to capitalize on the increased accuracy.
Creeping Barrage[]
- Costs 150
- Activation: Select Ground and Direction (within visible territory)
- Requires the Royal Artillery Support: Creeping Barrage ability
- Cooldown: 60 seconds
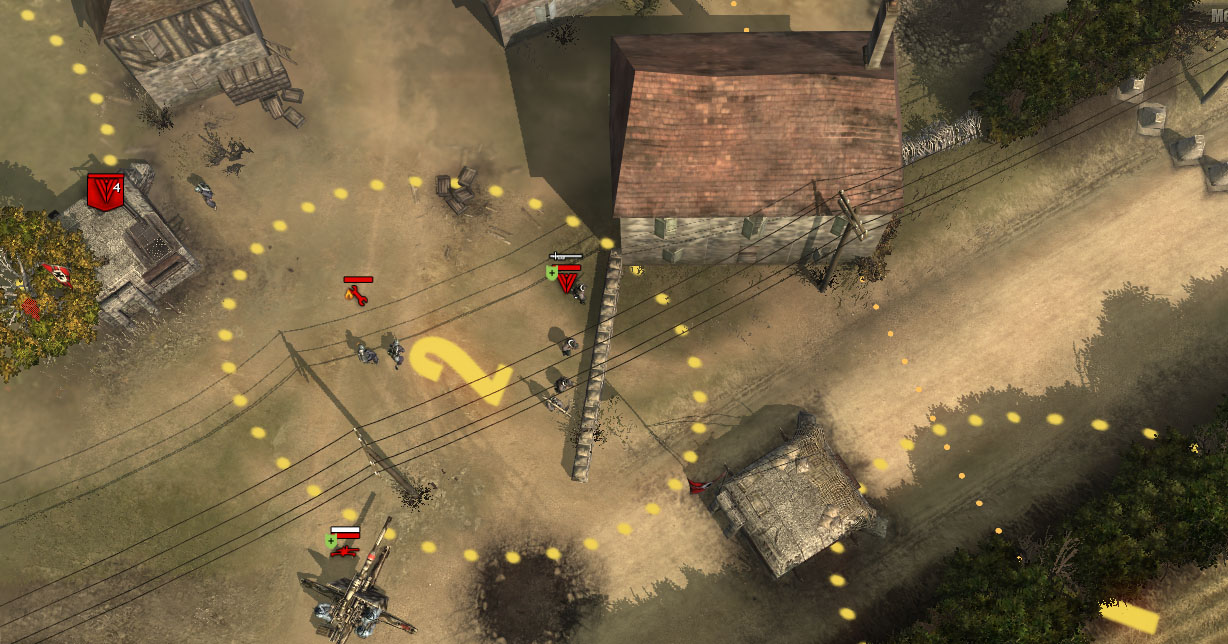
Lining up a Creeping Barrage on an enemy's defensive position.
When activating the Creeping Barrage ability, select a ground target anywhere within visible territory to serve as the "middle-point" of the barrage. Then select a direction. The 25-Pounder will fire around 15 shells, starting from the "beginning" of the barrage area, through the center-point, and towards the "end" area. This will generally bombard an area 70-meters long and 15-meters wide.
In truth, this barrage incorporates both shells fired from the howitzer itself and shells fired from off-map artillery, which basically increases the amount of shells landing in the targeted area without increasing the firing time. Both types of shells are identical anyway.
As its name implies, the barrage "creeps" forward along the direction you've set when activating it. The area marked as "1" on the screen when targeting this ability will be shelled first, then the area marked "2", and only then the area marked "3". One benefit to this is to catch the enemy by surprise, as they often withdraw from area 1 when the shells start falling, but won't always realize that the bombardment is going to cover a lot more ground than a normal barrage.
You can use the Creeping Barrage to cut a hole through enemy defenses by "directing" it through the enemy lines. Alternately, you can orient it "sideways", to obliterate an entire line of enemy defenses. The call is yours, and is based entirely on the requirements of the situation and the distribution of targets.
Another great use for Creeping Barrage is to remove land-mines from a major road. This barrage can clear any entire section of road where you suspect mines to be hidden.
When several artillery pieces use Creeping Barrage simultaneously, you can arrange the barrages to clear a box-shaped area, by firing the barrages 15 meters next to each other, oriented in the same direction. This can wipe out an entire enemy-occupied area within a few seconds.
Overwatch Barrage[]
- Costs nothing
- Activation: Select Ground (within visible territory up to 250 meters away)
- Requires the Royal Artillery Support: Overwatch Artillery ability
- Permanent until deactivated
- While active, Prevents the use of other abilities
- Cooldown: 20 seconds (on deactivation)
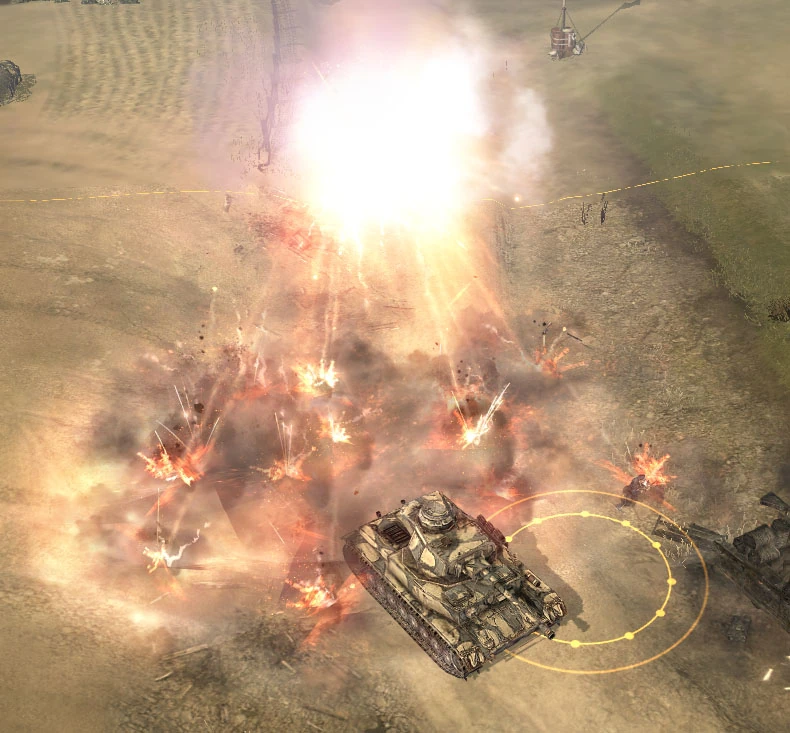
An air-burst shell from an Overwatch Barrage explodes in a radius of 10 meters.
When Overwatch Barrage is activated, select a ground target within visible territory. The 25 Pounder will rotate to face that target, and wait until it detects enemy units within ~15 meters of the targeted point.
If any unit is detected entering the target area, the 25 Pounder will quickly fire three air-burst shells at it. These shells are significantly different from normal shells; they airburst above their targets over a larger radius of 10 meters, dropping several bursts of shrapnel within that area. This randomizes damage in the overwatched area, as the scattered shrapnel can leave gaps untouched, or hit targets multiple times.
The target area can only be placed within visible territory, and within 250 meters of the gun itself. If visibility of that area is lost, the gun won't fire because it can't detect targets there. However, the Overwatch Barrage order will not cancel itself. You can re-establish eye-contact with the target area to resume bombardment.
While Overwatch Barrage is active, the artillery cannot use any of its other abilities. In addition, it will not participate in any Victor Target barrages (see Captain). You can order the artillery to stand down from Overwatch Barrage mode at any time. It takes 20 seconds to reset the gun for normal operations.
Overwatch Barrage is most useful for denying access to a certain area. The enemy will quickly learn that moving through the target area is extremely dangerous, and will look for other avenues of approach. This may force him to go through mined territory, to use choke-points or open ground for his advances, or otherwise disrupt his attacks. If possible, use several artillery pieces to Overwatch several such approaches, forcing the enemy to either go through them or be funneled into kill-zones protected by your other units.
Overwatch Barrages can quickly destroy bridges, as each individual piece of shrapnel in a burst is a separate blast, which partially bypasses the Allied artillery penalty against bridges.
Counter Battery[]
- Costs nothing
- Activation: Immediate
- Requires the Royal Artillery Support: Counter Battery ability
- Permanent until deactivated
- While active, Prevents the use of other abilities
- Cooldown: 15 seconds (on deactivation)
When Counter Battery is activated, the 25 Pounder will immediately set itself to "search and destroy" mode. It will sit still and wait until an enemy artillery piece, even Mortars, fires its weapons at your units. It will then return fire at that position with 3 very-accurate shells. If the target was foolish enough to remain stationary (or can't move to begin with), it will surely be destroyed. The 25 Pounder will continue to respond to enemy artillery fire automatically until this ability is deactivated.
This allows you to quickly react to enemy artillery fire without having to aim the Howitzer yourself. It prevents enemy artillery from using the fog-of-war to ensure their artillery won't be attacked.
Unfortunately, most German artillery units are very mobile. All they have to do is to launch their rockets/shells and quickly retreat, in which case the counter-battery fire will simply hit the position they were in, doing no actual damage. This is especially true when playing against the AI, which virtually always retreats its artillery after firing a barrage.
While Counter Battery is active, the artillery cannot use any of its other abilities. In addition, it will not participate in any Victor Target barrages (see Captain). You can order the artillery to stand down from Counter Battery mode at any time. It takes 22 seconds to reset the gun for normal operations.
Royal Artillery Support[]
The Royal Artillery Support command tree, as its name suggests, deals almost entirely with the upgrade of all British artillery units, bestowing extra abilities that shift British strategic emphasis from ground-attack to artillery bombardment. As such, it is intricately linked to the operation (and importance) of 25 Pounder Gun Howitzers.
A player choosing to concentrate on artillery support has three primary options: either field several Priest 105mm mobile artillery units, rely on several 25 Pounder Gun Howitzers, or mix the two unit types.
If emphasis is placed on static artillery, it is better to upgrade the "Defensive" tech line first. This opens up the following three abilities in the order listed below:
- Supercharge Artillery Rounds: Increases the range of 25 Pounder Barrages by replacing the basic barrage ability with 25 Pounder Super Charge. This ability can be used at any ground target up to 225 meters away from the cannon: almost the entire length of an average map. With this ability, you can either place your artillery further back to better protect it from the enemy, or use forward-placed artillery to strike accurately at any enemy target on the map - including the enemy base.
- Overwatch Artillery: Allows a 25 Pounder to continuously observe a target area for enemy movement, firing three air-burst shells at any target that enters the area. These shells explode with a radius of 10 meters around the impact, and as such are more likely to take out infantry and vehicles trying to cross the protected area. It can only be used on areas that are currently visible.
- Counter Battery: With this ability activated, the 25 Pounder remains in a constantly-vigilant state, waiting for enemy artillery to attack your units. When it detects an enemy artillery firing, it will immediately launch three accurately-fired shells at this target. This enables the cannon to destroy enemy artillery units at any range, though it does require the enemy to fire first.
On the "Reinforcement" tech line, only one ability is useful for the operation of 25 Pounders:
- Creeping Barrage: Allows the 25 Pounder to rapidly unleash a rain of about 15 rounds at a target area 70 meters long and 15 meters wide, anywhere within visible territory. The rounds will land in a creeping pattern, i.e. starting at one end of this target area and advancing towards the other end. This ability allows the 25 Pounder to destroy an entire line of fortifications, or clear a path through enemy lines.
Massive Base Bombardment[]
Players who choose Royal Artillery Support will often create several 25 Pounder Gun Howitzers, despite their hefty cost and Population Cap consumption, as these will be the most powerful units they can field. Together, a set of three Howitzers can level an entire enemy position to the ground by concentrating their fire on it. This actually leads to one of the best strategies available to the British army: leveling the enemy base.
Once the Supercharge Artillery Rounds ability is acquired, virtually all 25 Pounder Gun Howitzers will have sufficient range to hit the enemy base, regardless of where they are positioned. All you need is to get a unit close enough to the enemy base -possibly in a suicide mission- in order to get some idea of its layout. Then simply use the 25 Pounder Super Charge ability repeatedly with all cannons in order to destroy any structures you find. The enemy then has to keep rebuilding it over and over, costing them a large amount of resources and weakening their defenses. A small armored force can then simply drive into enemy territory to mop up the opposition.
Better yet, if you can get a unit close enough to the enemy base, consider gathering up plenty of munitions in order to launch a Creeping Barrage with all available Howitzers simultaneously. This will surely leave the enemy base in ruins, potentially destroying their headquarters as well.
Even moreso, if your recon unit can somehow maintain constant line-of-sight with the enemy base (which a single Stuart Light Tank can do with a Tank Crew Commander installed), you can use the Overwatch Barrage directed at the enemy base. This will cause your artillery to continuously fire at the base, using air-burst shells which have an exceptionally-large area of effect. They will neutralize any unit the enemy produces, will slowly destroy its buildings, and even kill any engineers rushing back to repair the damaged structures.
All the while, remember to make sure your defensive line is strong and impenetrable. If you control a sufficiently large territory and make sure not to leave any gaps, you can almost entirely waive the construction of offensive troops, thus keeping the Population Cap points required to maintain a large artillery force. A tank or two may be required to finish the job once the bombardment is done.
Tactics[]
In Company of Heroes: Opposing Fronts, the British army is built around a strategy that harks back to the first World War: entrenching a defensive force, building up firepower, launching massive attacks to capture more ground, then entrenching the new territories to advance the line forward, rinse and repeat.
In this strategy, artillery support is one of the best tools a British commander can have. It can deter enemies from attacking, fearing the combined might of your static defenses and an accurate artillery shelling. And it can significantly soften up enemy positions in support of a British advance. In either capacity, the 25 Pounder Gun Howitzer is one of the more powerful units on the battlefield.
The 25 Pounder becomes available surprisingly early: as soon as a Sappers squad is created and enough Fuel is gathered to pay its hefty cost. For this reason, the actual timing of a 25 Pounder's appearance on the battlefield depends largely on strategic decisions: i.e. the British commander's personal style. If emphasis is going to be placed on artillery, this gun may even be built as soon as it becomes available, to provide a very powerful support for early defensive construction efforts. Players with little dependence on artillery can hold off its construction until much later, when artillery is required for punching through enemy defenses in order to take their sectors more easily. And some players - but not many - even skip this gun entirely.
Once it is built though, the gun is a focus of power. It can dish out a lot of damage to the enemy, if used correctly, and thus is one of the most lucrative targets for enemy attacks. Since it lacks any defenses of its own (except the sand bags...), the 25 Pounder must be defended as well as possible against those attacks.
Placement[]
There are two main approaches possible when deciding where to place a 25 Pounder Gun Howitzer. Unlike other British emplacements, it can be used both offensively and defensively, and placement depends largely on which of these uses is more important to you.
To use artillery offensively, it should be placed as close to the front lines as can be allowed. This will allow it to fire deep into enemy territory, and can thus be used to support advances, destroy enemy production, obliterate enemy rally points, etcetera. A gun at the front lines is also more accurate when firing at enemy troops advancing on your positions, since its close-range accuracy is much better. However, this exposes the gun to damage, and gives the enemy a good target to hit with full force - punching quickly through your lines simply to destroy the cannon and retreat. Some commanders reduce this risk by putting extra fortifications on the line in front of and around the artillery.
Defensive artillery tactics put the gun further behind your lines, preferably on high ground. The distance from the enemy is often sufficient to protect it, and a mobile defense team can respond easily if any enemy unit somehow sneaks into your territory. This saves a lot of resources on extra defenses for the gun. The cannon is then used to provide heavy artillery support for defensive operations, bombarding any enemy unit foolish enough to come close to your lines. In can even use long-range fire to plug holes in your defensive line until you get the chance to fortify them with other emplacements.
Offensive Fire[]
The majority of players will construct a 25 Pounder Gun Howitzer for use as an offensive weapon. It is the only British emplacement designed for offense, and this is thanks to its great range. Without any extra upgrades, the 25 Pounder can hit targets up to 145 meters away - almost half a map's length. This usually means well beyond your front lines, deep into enemy territory - possibly even all the way to their base.
To be able to do so, the artillery piece must be placed as closely behind your front lines as possible - without directly exposing it to enemy attacks, of course. The closer it is to your line, the further beyond it the gun can fire.
Offensively, 25 Pounder Gun Howitzers are generally used to disrupt the enemy's operations or to support an advance.
Breaching Fire[]
- In this type of artillery usage, the 25 Pounder Gun Howitzer will barrage an enemy position preceding an advance by British armor or other assault troops. The barrage is meant to kill off exposed infantry, do preliminary damage to tanks and vehicles, and to weaken bunkers or other defensive emplacements. Once the British advance begins, the opposition will hopefully be less well-equipped to oppose it.
- Good breaching fire requires good knowledge of enemy positions, acquired usually by having a British tank do reconnaissance (sometime in force) to detect and note down the layout of the enemy's defenses, and bombard the most valuable or heavily-concentrated targets.
- The most useful kind of barrage to use in this instance is the Creeping Barrage, providing this ability is available. It can cut a path clear through the enemy (by pointing the barrage through the enemy lines), or bombard an entire section of the defensive line all at once (by pointing the barrage sideways, so that the target areas are aligned with the enemy lines).
Interdiction[]
- Interdiction is the act of cutting enemy supply lines or troops headed to the front lines. British artillery can do this very well, but it requires advanced reconnaissance well behind the enemy's lines, to determine the point where the enemy is massing his next attack force. This can sometimes be done with Commandos, but the opportunity may present itself if one of your American allies in a multiplayer/skirmish match is using the Airborne Company ability of recon flights.
- Interdiction is usually best with a regular or super-charge barrage, as these do not require line of sight. In other words, you don't need to have a unit observing the enemy's rally point in real-time to be able to attack such a far-away target.
- It is sometimes possible to use an Overwatch Barrage on the target area instead. This may cause a lot more destruction in a shorter period of time, but requires the target area to be constantly visible until you're satisfied with the results.
Strategic Bombardment[]
- If out of targets, always keep the enemy base in mind as a target - assuming your guns can fire that far. In fact, any concentration of enemy structures will do as a target for artillery.
- Naturally, since the enemy base is usually very far from the front lines (unless you're already holding a large portion of the map), the most useful ability to assist you is the 25 Pounder Super Charge ability. A super-charged 25 Pounder can usually fire clear across the map, even if placed well behind your front lines.
- This sort of attack is likely to kill any infantry or vehicles loitering around in the enemy's base, destroy weaker buildings or emplacements, and require your opponent to put all his engineering units to work fixing the damage.
- If you actually want to level your opponent's structures, you may need several artillery pieces firing at the same time. This will reduce a large portion of your enemy's base to rubble, and can win a battle all on its own.
Victor Target[]
- With a Captain on the field, the British have an interesting way to deploy artillery, regardless of how far the target is. This is done by reconnoitering an enemy position, and then using the Captain's Victor Target ability against whatever fat target you can find.
- When the ability is activated, every available 25 Pounder emplacement (as well as any available Priest 105mms) will open fire at this target simultaneously, regardless of range. All it requires is that the target be in visual range of any of your units. Again, range is completely not an issue, allowing even the furthest-back artillery piece to participate.
- Correct use of Victor Target can allow you to place your artillery far back, where it can't be hurt by enemy attacks, and still use it to bombard any target you can find with your forward recon units.
Defensive Fire[]
Artillery is not just an offensive weapon - it can be used defensively in several different ways, all of which are designed to stop or destroy an enemy unit that has made contact with your forward defenses, or is trying to slip through them.
Defensive artillery is often best situated some distance behind your lines, to avoid attacks from enemy units and counter-artillery fire. It should cover the area visible to your defensive units and emplacements, and preferably a little beyond that.
Defensive fire can either block an enemy's advance through an open hole in your defenses, or destroy any particularly-heavy target that might pose a problem to your defenders. With special abilities, it can even deny the enemy passage through one of their own forward sectors.
Zeroing In[]
- A good use for defensive artillery is to single-handedly deter enemies from entering your territory through a specific sector. In effect, by shelling an open gap in your defenses constantly, you can basically convince the enemy to stay away from there until such time that you can set up proper defenses. This can even be used while your Sappers and Infantry Sections are constructing defenses there, to keep the enemy off their backs.
- Naturally, to avoid killing your own troops, keep the fire forwards of their position. Any enemy unit trying to assault your weak spot will get shelled, dissuading the enemy from assaulting it. Once emplacements are up, the artillery piece can focus on protecting other sectors.
- The Overwatch Barrage ability is very well-suited for this sort of task. Units entering the selected area will almost certainly be destroyed, unless they can get through it very quickly. Infantry, therefore, will get decimated, and light vehicles need to be aware of the Overwatch area to know not to stop or rally there - otherwise they too will get destroyed. The extra bonus is that the artillery piece will continue firing at any unit that enters this area, so you don't need to wait for cooldown or manually order it to attack the zone over and over.
Defensive Support[]
- The simplest defensive use of artillery is in support of your defensive emplacements. When enemy units are spotted heading towards an emplacement, or are already attacking it, that would be a good time to start a barrage. This will whittle down enemy forces, making it easier for the emplacement to destroy them.
- You can use either a regular barrage or an Overwatch Barrage for this action.
Defensive Interdiction[]
- If you've spotted a particular region from which enemies are launching their assaults, for instance a main road through which enemy units generally advance on their way to your lines, you can simply tell your artillery to continuously bombard that spot. Until the enemy realizes what you're doing, they could lose a lot of units to this.
- The ability you want for this kind of firing mission is Overwatch Barrage. Placed on an important crossroads, for instance, it would tear to shreds most forces coming through. This forces the enemy either to use side-roads (which could slow or overstretch his attacks), or to drive through the bombarded area quickly and without organization. Either way makes your enemy's attacks a little less useful overall.
- Unless you have plenty of artillery pieces, there are usually better uses for them than performing this sort of interdiction. It's only useful in specific situations and on specific maps (especially where bridges or narrow passages are common).
Counter Battery Fire[]
- One of the possible uses for 25 Pounder Gun Howitzers is to set them to Counter Battery mode. In this mode, whenever an enemy artillery piece opens fire at any of your positions, the 25 Pounder will launch a very accurate barrage at that target. The idea is to quickly knock out the enemy's launchers before they disappear back into the fog-of-war.
- Unfortunately, this ability is not as useful as it sounds, thanks to some design flaws and balance issues. For one, most German artillery is fired from mobile launchers like the 150mm Nebelwerfer Rocket Battery or SdKfz 251 Half-track, which can both retreat as soon as they're done launching, and might be missed by the counter barrage. Almost the entire rest of their artillery is off-map, and cannot be hit by the 25 Pounder Gun Howitzer to begin with.
- The only time this is truly useful is against enemy mortar fire and Hummel artillery vehicles, neither of which are likely to get away in time when counter-barraged.
Weaknesses[]
As mentioned several times above, the 25 Pounder Gun Howitzer has absolutely no defensive capabilities. Its crew cannot return fire at enemy units, and enemies within 35 meters (the normal engagement range for most units) cannot be targeted for bombardment.
Therefore, always keep the gun in a secured position: either far behind your lines where enemy units cannot reach it, or right behind your most-fortified defensive positions at the front lines.
Remember that wherever it is placed, the 25 Pounder Gun Howitzer is a lucrative target for enemy fire - especially indirect bombardment by the enemy's own artillery or air-power. It's a good idea to keep a unit of Sappers entrenched nearby so that it can rush over and repair the gun whenever it is attacked thusly.
As with all other British emplacements, if the 25 Pounder Gun Howitzer is damaged severely but not destroyed, its crew will be killed and it will become a neutral weapon. In that case it can be captured by an enemy infantry squad. Allowing this would pose a major threat to you, giving the enemy a gun that can be used to bombard your own position. Prevent it at all costs!!
Historical Data[]
The 25 Pounder Gun Howitzer or known as Ordnance QF 25 Pounder or simply 25 Pounder is a major British field gun/howitzer introduced into service just before World War II. It was fielded extensively by the British and was considered to be the best artillery piece of the war, with a high rate of fire, lethal firepower, and a very long range, plus reliability.For an artillery piece it is considered to be not lethal enough because of its low calibre of just 88mm.Therefore,in many cases it could not be used for destructive fire but rather used for suppressive fire. Hence,it was starting to get replaced by larger 105mm howitzers, even during world war 2. But due to its already existing large numbers, easy maintenance and supporting logistics it was one of the most versatile and reliable artillery pieces during world war 2. It served even after World War II for the British Commonwealth and is used even today by many nations, making it one of the longest serving artillery guns of the 20th century.
In the real world, it was possible to tow the gun around the battlefield, using trucks, tractors or tanks. This is why it is fitted with two large front wheels. Unfortunately, for balance purposes, the gun was rendered immobile in Company of Heroes. Also, the 25 Pounder Gun Howitzer wasn't just a howitzer, when it was first fielded in the North African Campaign, it was used as a field gun, and also served antitank roles. It could be elevated to high angles, so it could fire like a howitzer.
Quotes[]
"Fucking Rain!"
"Super charged, super charged, all callsigns FIRE!!"
”Hup to it fellas! The boys need us!”
Gallery[]
")
")
| British Arsenal | |||||||||||
|---|---|---|---|---|---|---|---|---|---|---|---|
| Command Trucks | |||||||||||
| Infantry Squads | |||||||||||
| Light Vehicles | |||||||||||
| Medium Vehicles | |||||||||||
| Heavy Vehicles | |||||||||||
| Command Units | |||||||||||
| Defensive Structures | |||||||||||
| Other Structures | Casualty Clearing Station · 25 Pounder Gun Howitzer | ||||||||||
| Royal Support | |||||||||||
| Royal Support-specific Units |
| ||||||||||
| Royal Support-specific Structures |
| ||||||||||